Mid-Century Modern(ization)

Redefining modern for a family-friendly home


2 Comments

My Best Find Yet

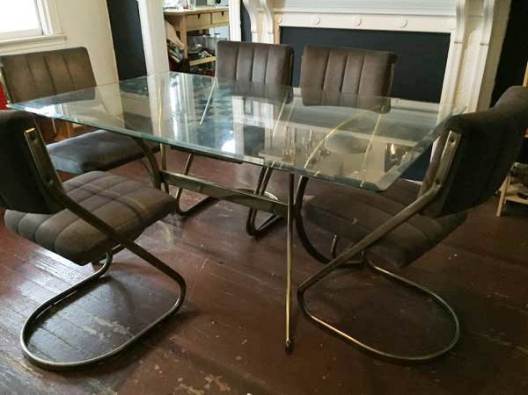
I’ve scored a lot of items for a song on Craigslist, in thrift stores, and off local exchange websites.  But this.  This one is for the books. These chairs may not look like much at first, but trust.
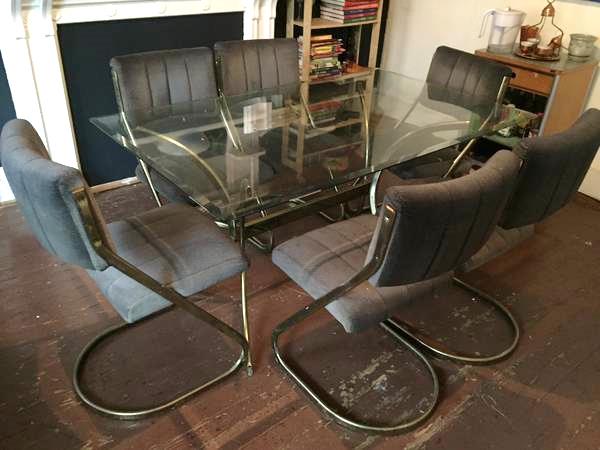
Chairs
Ugly right?  Even hideous? Sure.  And keep in mind this photo has also been heavily edited from the original Craigslist post which was so dark I could barely tell how many chairs there were.  But I was smitten from the get-go.

I’ve been on the hunt for some vintage upholstered chairs with metal bases for at least a year.  Our dining room table is very nice with clean modern lines, but it’s also very dark.  I considered getting a new table, but the one we  have is beautiful, of great quality, and it has two leaves which come in very handy during the holidays. Finding a table with similar qualities in a lighter toned Scandinavian style (and within budget!) was a tall order.  Minimalist tables just don’t come in 100″ lengths like I was looking for so I decided pretty early on that swapping out the chairs was my best bet.

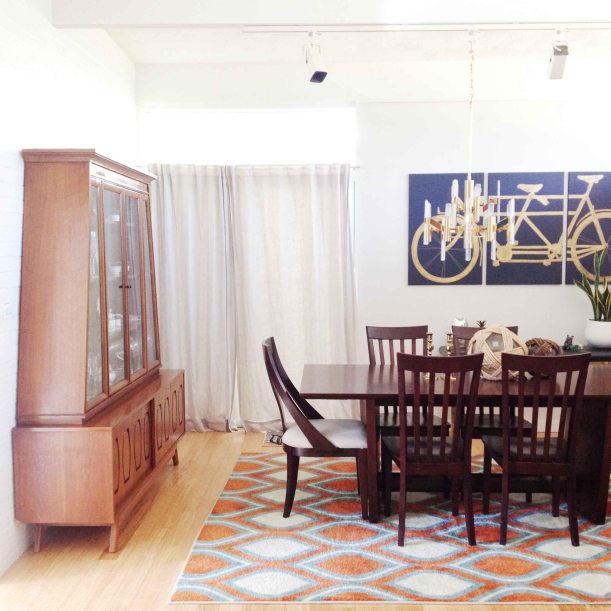
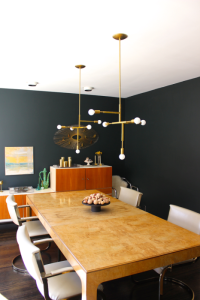
Here was the current state of our dining room. Not bad, but definitely dark and the traditional wood chairs were dragging it down.  I knew the whole space could benefit from the addition of a few fun and unexpected pieces. IMG_4243
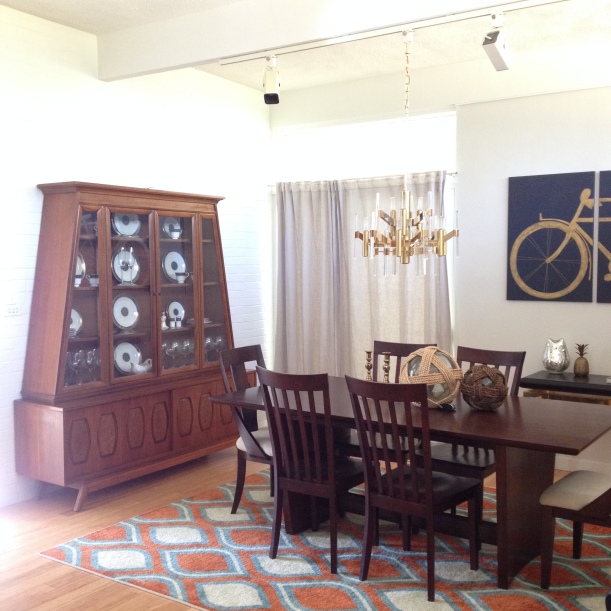
So I knew I didn’t want more wood chairs even though the vast majority of MCM chairs available are teak (and fabulous!).  Instead I wanted to contrast the existing darker table with some metal framed chairs that would give us a bit of an eclectic vibe.  And blue!  I was jonesing for blue upholstery to coordinate with the  blue in the rug and with the blues in the adjacent living room.  That’s asking a lot for a vintage find, but I was open to recovering them for the right price.  The right price being under $250.  It was a tall order for sure and most the chairs I found were thousands of dollars for a set of 6.  Some of the best deals were in the $600-800 range which was still way more than I was willing to spend on something we didn’t need.

Enter patience with a side of persistence.  I checked Craigslist multiple times per week for months and months.  Maybe years.  I’ve lost count.
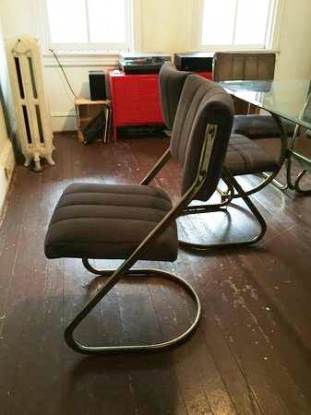
00w0w_8IijxMDctvL_600x45000T0T_gHXjqnIabW9_600x450
(We passed on the matching table–it was in good condition but way too small for our needs)

And so when I saw these for $120 on my lunch hour (in the perfect grey/blue!)  I was doing a happy dance in my desk chair.  I sent an email to my husband with a photo and a subject line that simply read:  “Waaaaant”.  Bless his heart, his reply was, “What baby wants, baby gets.” And my obvious response:
1
That’s also when I dropped the bomb that they were all the way down in DC (about an hour away).  He wanted to know if they were going to fit in our minivan with the two car seats.  I sent him this.
2
(If you don’t ever communicate solely in memes you must try it.  My boss and I will often go days sending only memes and gifs back and forth. It makes life so much more fun.)

He then asked, “What the eff are we going to do with all the chairs in our house though?”  It’s true … I sort of hoard chairs.  And at the time we had at least 5 stuffed in closets.  And so …
3
That’s what I told him and that’s what I did.  I sold 8 of our dining chairs for $150 and picked up these vintage babies for $120.  But oh my God.  They were bad.  So bad. Far worse than I imagined.  I couldn’t even look my husband in the eye as we loaded them into the back of the van.  They were horrid.

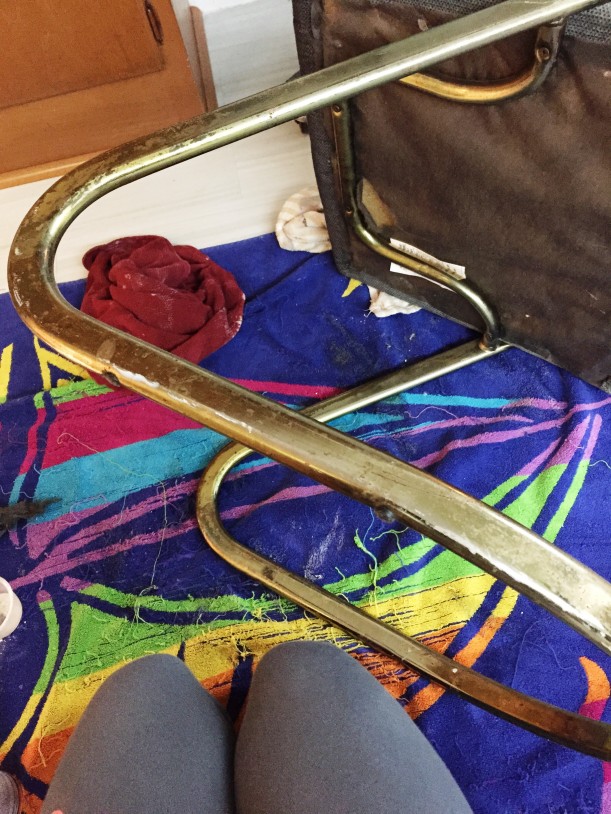
I was scared to look too closely at them and so at first (based solely on the fantastic case of heebie jeebies they gave me) I assumed the upholstery needed a comprehensive (and perhaps professional) cleaning. In fact, I spent the whole drive home on my phone trying to figure out where I could rent a steam cleaner with upholstery attachments (Home Depot, if you need one).  But when I got them home and brought them in I realized that the upholstery was actually in exceptional condition. It was the metal frames that were wrecked.
IMG_2008
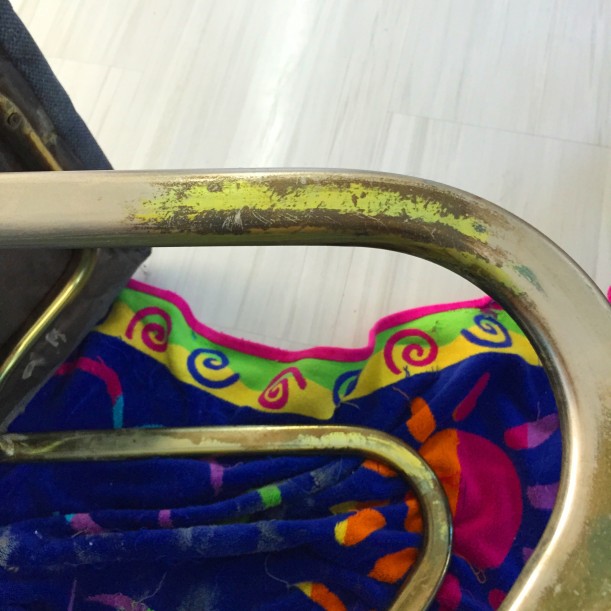
The brass frames were so badly tarnished and splotchy that I was worried I was  going to need to paint them (not at ALL ideal, but if you ever have to go this route I feel a glossy white or black would make it look more intentional than a faux metal tone).  But I decided to try to clean them before I did anything drastic.  I used hot water, Bar Keeper’s Friend, and steel wool and was amazed that the brassy tone started to come right off and reveal near-perfectly preserved steel frames underneath.
IMG_2111
My best guess is that these chairs were kept in  a  storage unit without temperature control.  That would explain how the upholstery stayed pristine while the frames suffered.  The leg in the foreground here has been scrubbed clean while the leg in the background is still untouched.  I’m still not certain if I simply removed decades of tarnish or if I removed some sort of faux brass finish (though I’m leaning toward the latter). It didn’t flake off or anything … the brass tone just slowly rubbed away.
IMG_1995
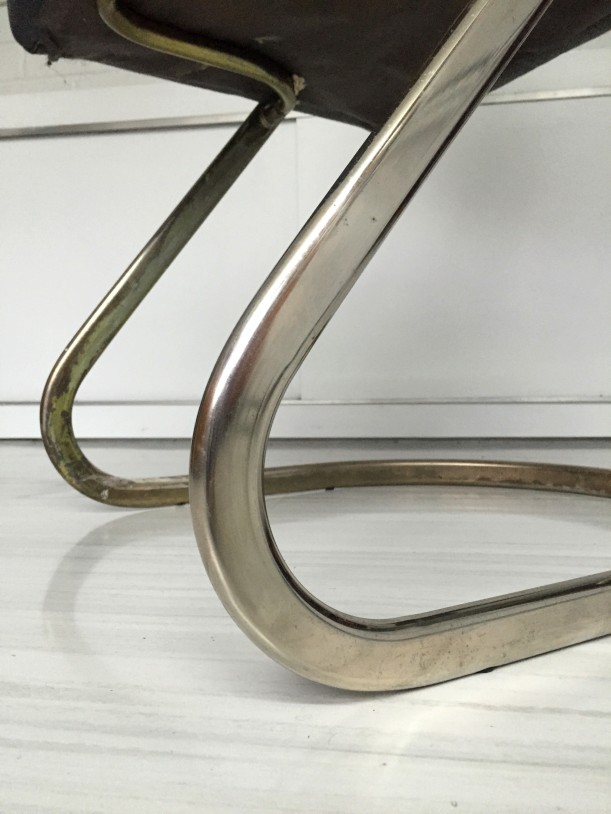
It took roughly one hour to restore each chair. Rather than disassemble for cleaning I opted to use duct tape to cover and protect the upholstery where it touched the frames. Then I just went to town with the steel wool and cleaning agent. It was messy work and not easy. My initial excitement drove me to finish two chairs that first night before I petered out and then I worried I wouldn’t find the motivation to finish the remaining four, but some how I managed to get them all clean within a week.  When the frames were sparkling I simply removed the duct tape and just spot cleaned the fabric with Shout. Amazingly, not a single seat or backrest was stained!

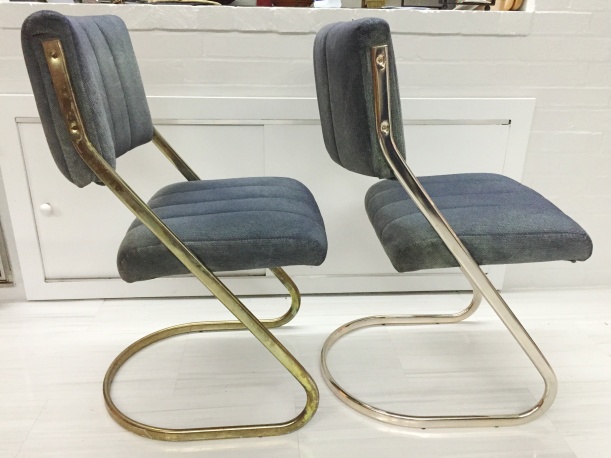
It was hard work and my body is still aching from the effort,  but it was SO worth it.  Who knew these beauties were lying in wait under all that ugliness? The chair on the left is the condition I brought them home in and the chair on the right is all clean and shiny.
IMG_2006
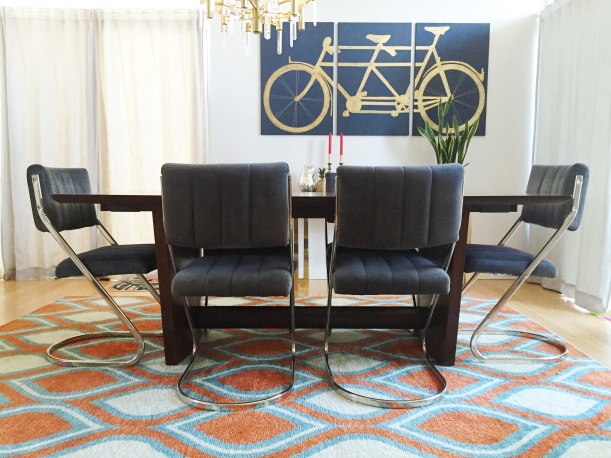
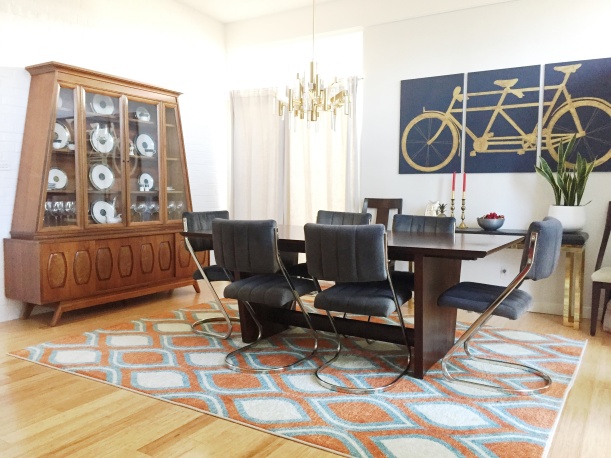
And here’s how they’re looking in the space.
IMG_2137
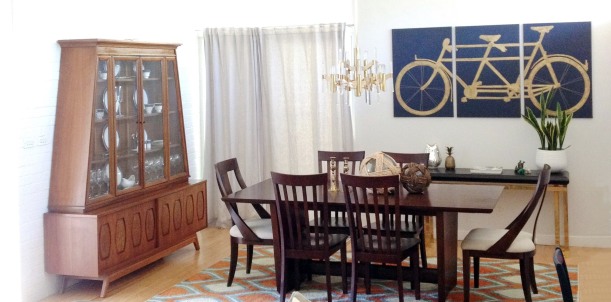
I’m digging the mixed metals look and how the steel plays with the brass chandelier (read about that here!) and the gold tone sideboard and bicycle art. I kept the two formal end chairs from my old set (these were actually purchased from Scan with the table — the 8 chairs I sold were cheapos from Value City). Not sure what my plan is for them yet, but for now they’re flanking the sideboard.
IMG_2140
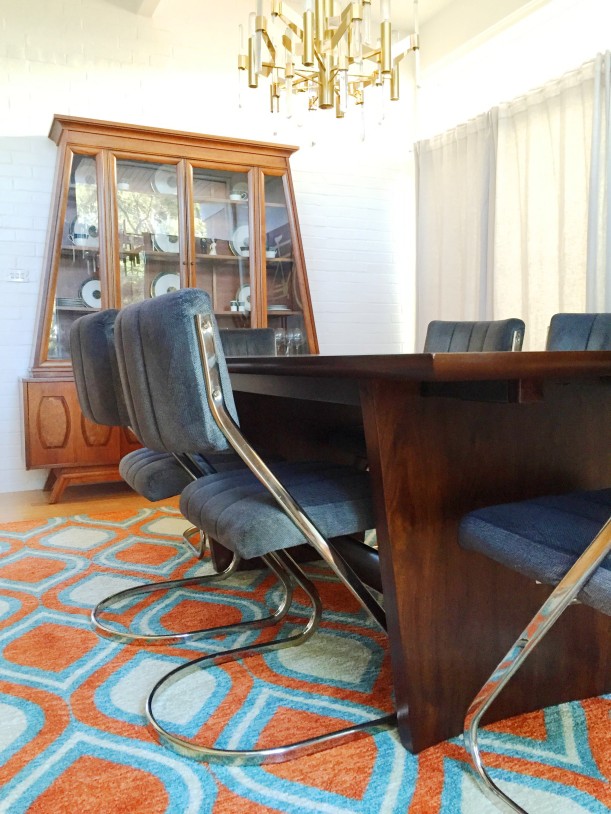
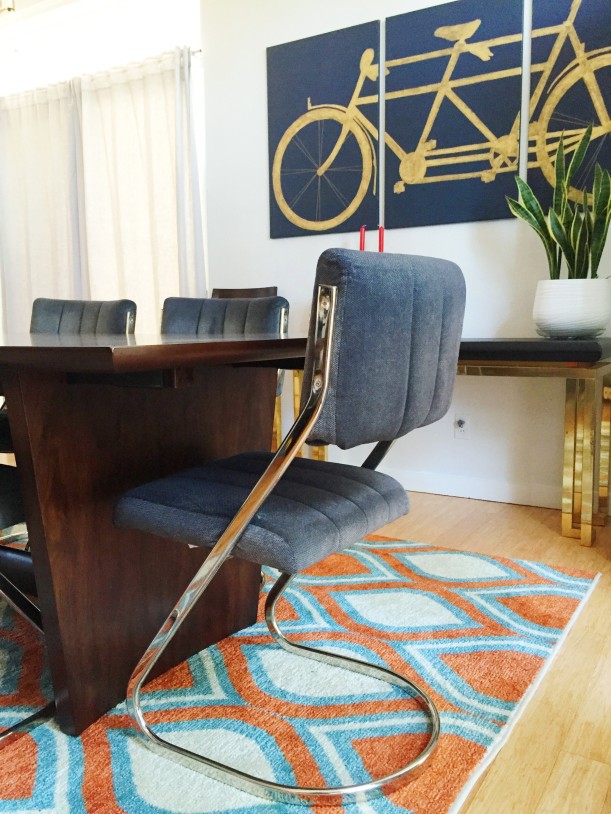
The upholstery is perfect!  Up close it’s actually a turquoise velour intermixed with navy  so from farther away they just look like a deep blue.  The color coordinates both with this rug and the new turquoise rug 5′ away in the living room — it has the exact same two shades of blue.  Ever experience small things in life that just couldn’t possibly sync any better?  This is one of those happy accidents that makes me feel like I’m on my right path. Cheesy, but true!
IMG_2141

IMG_2145
So now I have $30 in my pocket, arms of steel from all that scrubbing, and a pretty fun dining room that I’m over the moon about. Life is good.

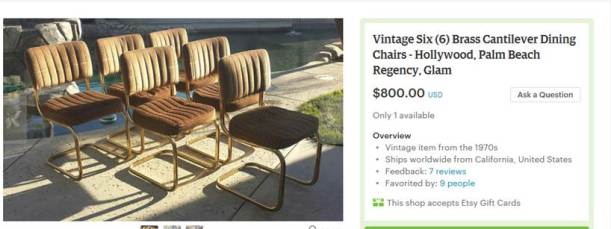
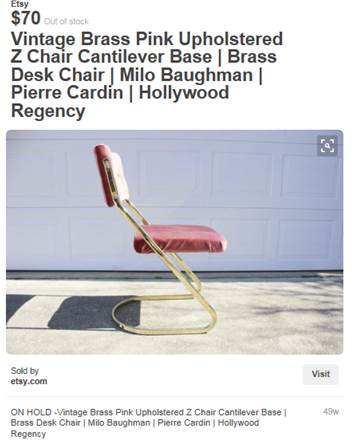
I looked these chairs up on the internet using search terms such as “cantilever dining chair” and “metal Z chair” and found a few similar ones for $70-140 each — only one full set of six and it was sold for $800.
6
5
4
So yeah, I’m pretty tickled with this find. Can’t wait to see what finds me next!


2 Comments

A Vintage China Cabinet for a Song

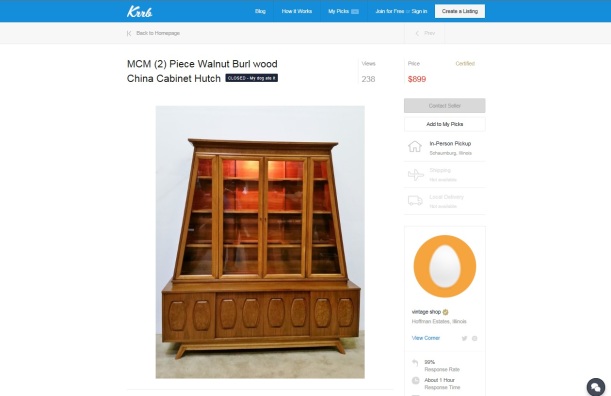
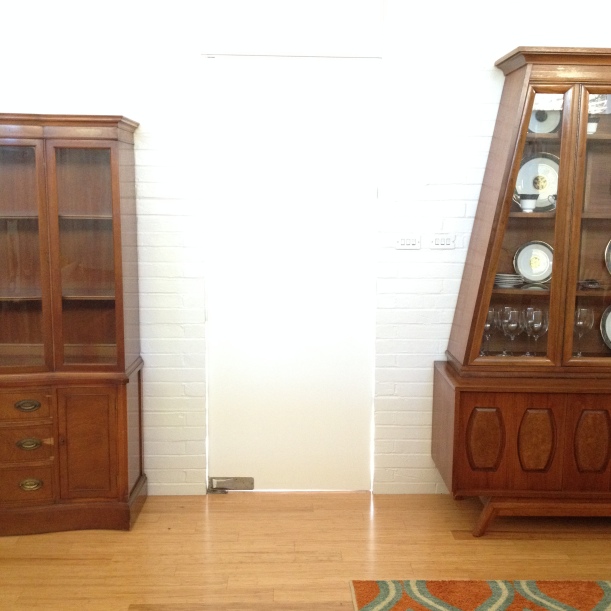
When I first saw this china cabinet on Craigslist I thought it was hideous. I can’t find the original image now, but it was your typical dark, wildly out of focus photo that are in shocking abundance on sales sites.  I remember thinking, “Who in their right mind would want that atrocity in their home?”  But I guess I am easily manipulated by marketing (I am a marketer by profession after all) because when I saw this on Krrb two days later I was suddenly singing a song of a different tune.

Untitled 1
click for source

The exact same walnut burl wood china cabinet from the 1960s. For $899.  I immediately went back and checked the Craigslist site, yep. $70.  I suddenly had to have it.  Can we also pause for a moment to note how strange it is that I stumbled across two of these rare cabinets in a matter of days? Definitely weird.  Quite possibly destiny.

Ok, so now I was in love with it, but I had to do some major convincing with the other loves in my life.  My mother (who I run all my harebrained ideas past) thought it was “God awful” and my husband (who has ultimate veto power) said it was “strange” and looked at me like I had three heads.  I have to say, I’m getting used to that look.  But he’s always open to a good deal and so I showed him the Krrb link above and told him that if it didn’t work out I could sell it at a profit.  Maybe not $899,  but definitely more than $70 if I took some halfway decent photos in nice light.

And so. Here we have it.

IMG_4246

I am just in love with it’s funky lines. That trapezoidal top, those feet.  It holds a ton of stuff and even has a light inside which is fun.

So it was out with the old and in with the new.  I sold our smaller, traditional Drexel hutch for an even $70. Gotta love free swaps!

IMG_4243

This new to me hutch is actually two pieces. And HUGE.  It’s nearly 7′ tall and, with our high ceilings, it fills the space so much better than before.  The Drexel always looked so small and lost. Not this guy.  He’s suddenly the focal point of the whole room.  Even Kirk loves it.  And my mom admitted that I was right all along. ;)

IMG_4244

I recently updated these dining chairs, too (another swap that didn’t cost me a penny!).  Stay tuned for more on that!


2 Comments

A No-Cost Master Bedroom Facelift

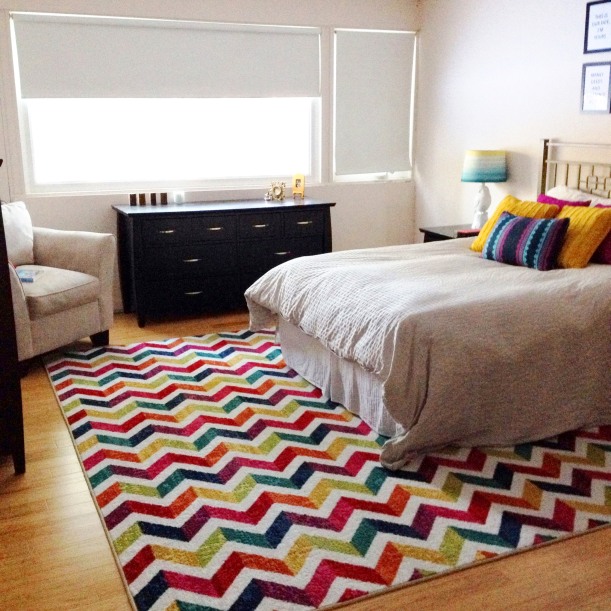
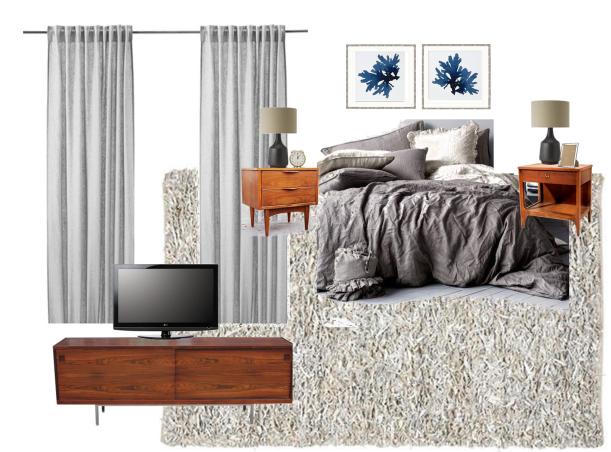
It’s been ages, but you may remember that last summer I posted a series of mood boards of our master bedroom in an attempt to find a bit of inspiration.  I settled on a soothing monochrome that was as far from our current technicolor palate as could be and decided to take us from this:

IMG_2906

to this:
Actual bedroom

My main problem–aside from the rather garish décor we were currently rockin’–was that I didn’t have any money to fund an overhaul. But that issue resolved itself when I started to unload what was already in the space. The bedroom dressers and night stands went for $900, the headboard for $100, the Ikea cube shelf for $75, and my DIY owl lamps (remember those!?) for another $30.

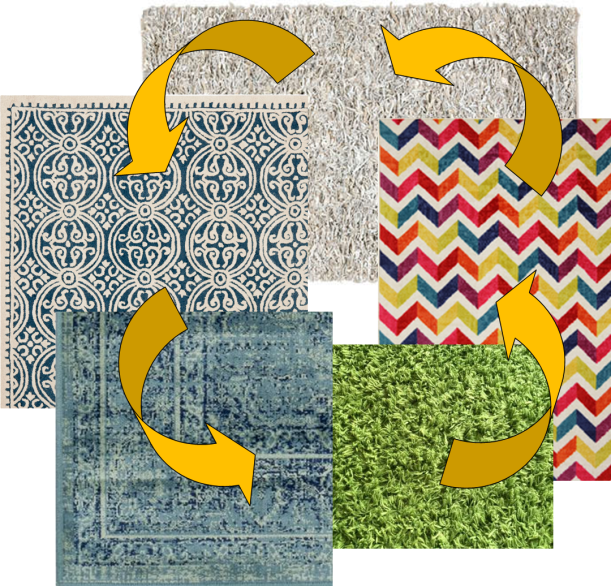
Around this same time we scored a new rug for the living room for $75 (my husband thinks says it “fell off a truck” … meaning, I suppose, that he bought it from someone in a dark alley after midnight) and which we’ve since re-sold for $125 (score!).  So the cream shag living room rug went into our room, the rainbow rug went to Logan’s room, and Logan’s green Ikea Hampen rug was sold for $25.  So we actually profited $75 on all the rug swapping.  Of course I then had to buy yet another rug for the living room, but that’s another post. Confused? Here, I whipped up this handy graphic to simplify it confuse you more.

Picture1

There. That’s settled.

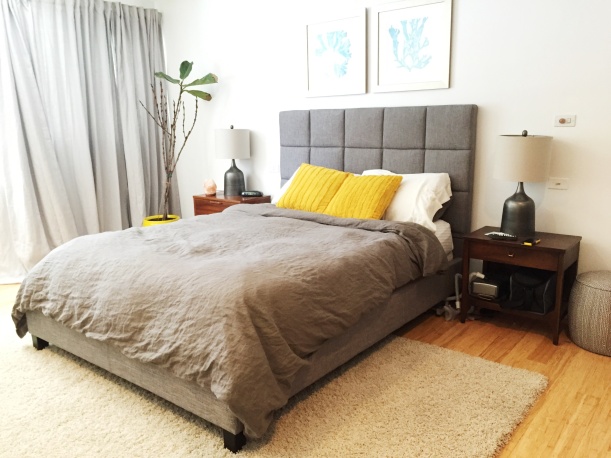
Aaaanyway, long story sort, but the time I finished selling every thing off we had $1180 to play with and keep this makeover ‘free’ … and I only spent $985!   So, without further ado here’s where we stand today.

IMG_1276

My poor fiddle leaf fig has been clinging to those last four leaves for a year (remember how lovely it once was??) … it’s a slow death.

IMG_1287

Yes, we have cords. *gasp!* And my husband has a sleep apnea machine, sue me.  I’m such a bad blogger. *eye roll.*

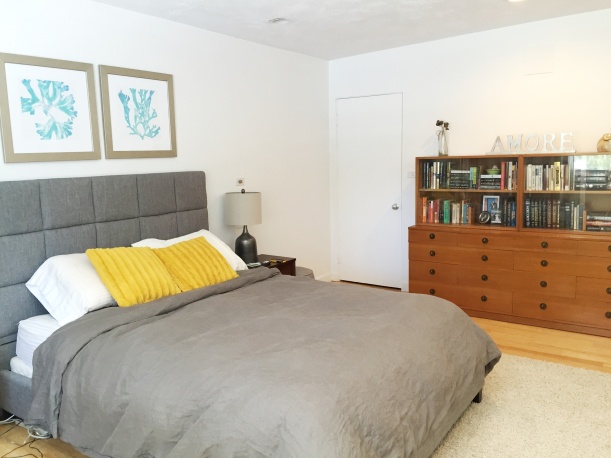
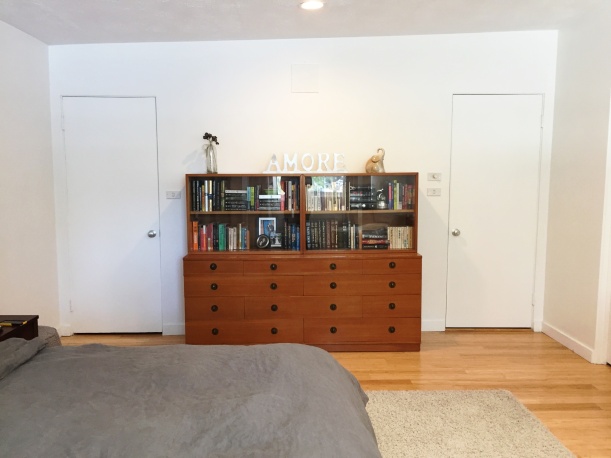
The botany prints aren’t the deep blue I was hoping for, but they’ll do. The yellow pillows look better in person, I promise. The unit with the books is actually comprised of four pieces.  I love it. And I love that it was free.

IMG_1286

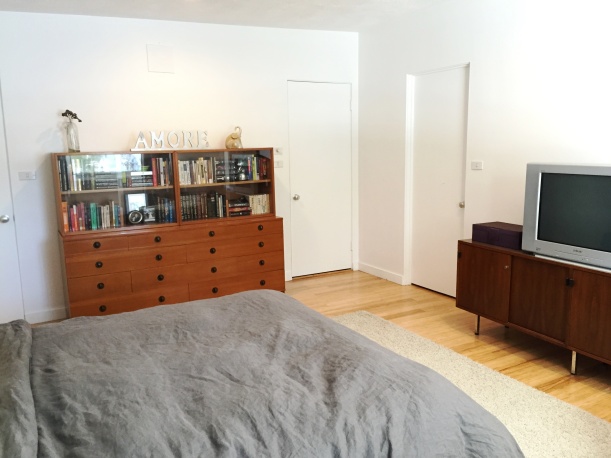
I am thrilled with the mis-matched vintage pieces here.  It gives the room a bit of a bohemian vibe that is simple yet comfortable. I appreciate a design that allow you to make mistakes (because I am far from perfect!) and this set up is definitely very forgiving.

IMG_1275

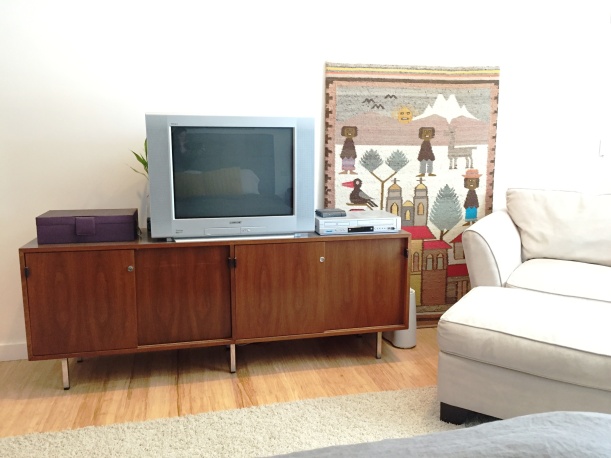
I picked up this enormous mounted tapestry at a thrift store.  I purchased it with the plans to recover it, but it’s growing on me! That little bamboo plant was turning yellow (probably because I had it hidden behind a tv??) so I moved it to the bathroom.

IMG_1285
LOVING our new white paint job too.  Everything feels so much brighter and just cleaner — I can’t even begin to tell you. The ‘amour’ sign is actually gone now. My elephant is here to stay awhile though.

Here’s how it broke down:

Upholstered bed: $385, Overstock
Linen duvet and shams: $100, H&M
Knoll credenza: Free, inherited
Brasilia nightstand: $125, vintage and worth every penny
No-name MCM nightstand: $25, purchased vintage a couple years ago
No-name MCM sideboard: Free, Craigslist*
Lamps: $60, HomeGoods
Art prints: $40, HomeGoods
Curtains and thermal liners: $250, Ikea

*We actually picked this up as part of a 6 piece set–all free!–and the rest is still hanging out in our garage while I figure out what to do with it.

So yeah, it’s not magazine worthy or anything–and iPhone pictures are what they are–but I’m digging it. It definitely feels more restful and welcoming and just more …me.

A Gaetano Sciolari Chandelier

4 Comments

When we purchased our home a 2 years ago we inherited two vintages pieces that bring out polarizing opinions from anyone who visits.  Some love the wrought iron piece above our fireplace while others hate it.

IMG_3907

There is a signature on this piece that says “Levitt”.  In what looks to be silver Sharpie, but is probably silver paint.  I’ve not been able to locate any information on it, nor have I found one even remotely similar.

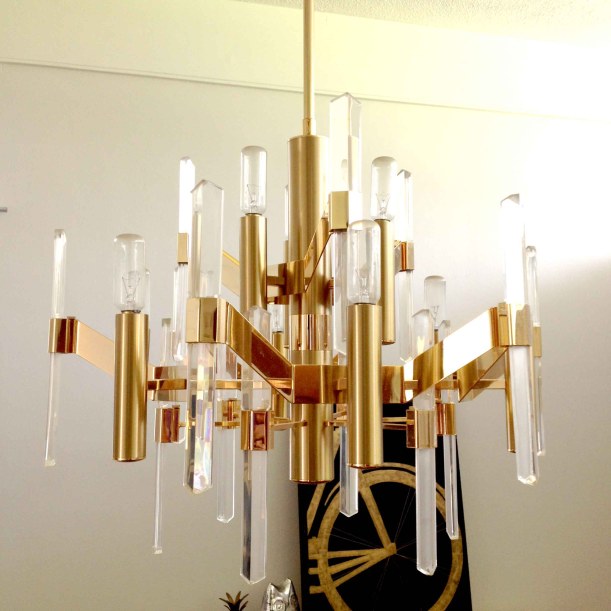
Some say our chandelier is wonderfully retro and others find it gaudy.

Sciolari_ed

Personally, I’m not absolutely in love with either of them, but I don’t find them overly offensive either.  Which is why they’re both still prominently displayed 2+ years later.  I don’t think about them much — they’ve just become part of the landscape — but when I do, I’ve passively tried to research their beginnings.

IMG_4244

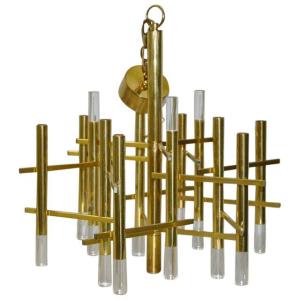
Yesterday, while Googling “vintage + Lucite + brass + chandelier” (I swear for the hundredth time), I stumbled on Italian designer Gaetano Sciolari.  The masterpieces that caught my eye weren’t the same as ours, but they were similar enough that I jumped down the Google rabbit hole and started researching his lighting designs.  This is the design that caught my eye.

a6d18b80-2b8a-4b55-8ba2-d7398159b521

source

And then I found it.

untitledsource

Our chandelier.  Listed for $3,500.  A Gaetano Sciolari Chandelier.  And it’s not Lucite … its Italian crystal. Hot damn.

IMG_4242ed

(I know I owe you a post on this fabulous china cabinet. We just picked it up last weekend and I am IN LOVE. I am also obsessed with finding new chairs for the table. OBSESSED.  I have so many ideas to share — hint: vintage + metal)

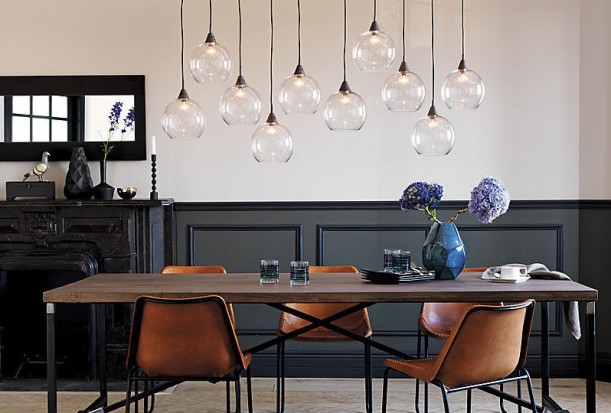
Anyway, not knowing our chandelier’s value I had been contemplating a variety of fixtures for above this space.  The Firefly II light at CB2 caught my eye.  I feel as though it would fill the space in this giant room a bit better than the Sciolari.  And I have a handsome gift card for Crate&Barrell/CB2/LandofNod so I’m still heavily leaning that way.

4FireflyPendantLight_LeatherChairs-e14448614838421

All I know is that we need a fixture with multiple bulbs — since the space is so vast it can easily feel too dark.  And I want it to be a statement piece so that it will draw your eye all the way across the room when you walk in.  At the same time I don’t want it to completely block any artwork we hang on the back wall like a saucer light would.

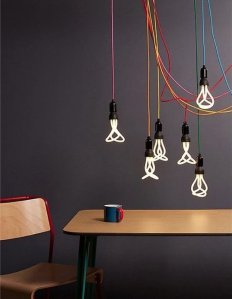
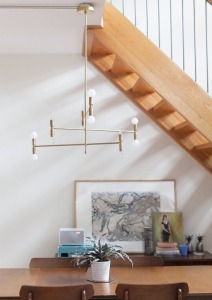
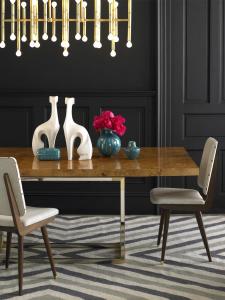
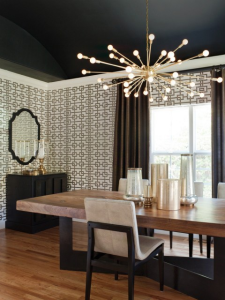
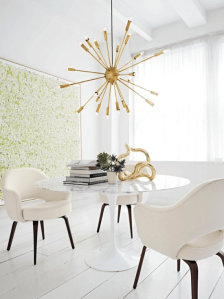
ecf6721bfc560ab041d97258c66db940 IMG_5946 c48d4__Elegant-dining-room-with-bold-pendant-lightinguntitled 1 untitled IMG_2196-466x700
(1) Popsugar (2) Apartment Therapy, original source unknown (3) Best of Interiors (4) Houzz (5) Euro Style Lighting (6) Modfrugal

And I just realized that almost all my picks are brass … interesting.

The last one is a DIY, which is tempting … but intimidating.  And you know as well as I do that I’d never get around to actually making it.  I can’t even get around to washing my hair most days.

My husband says sell it and I have to say I’m inclined to agree …

So, fine readers.  What would you do?


4 Comments

Gordon E. Sugar — Custom Home Builder

I stumbled on the obituary of our home’s builder this morning and thought I would share it here.  This is my 100th post here at Mid-Century Modern(ization) so it seemed fitting.  Gordon Sugar built and lived in the home two doors down from us — I believe until his death as the home sold just over a year later.

As published in the Baltimore Sun, February 21st, 2000:

Gordon E. Sugar, 79, custom home developer

Gordon E. Sugar, a developer of custom homes for 50 years and one of the first to build outside the Beltway in Baltimore County, died Friday at Johns Hopkins Hospital of complications from pneumonia. The Stevenson resident was 79.

Through his company, Gordon E. Sugar Inc., he built several hundred houses in the Stevenson Road area, starting in the late 1940s. Most of the houses featured nearly flat roofs and glassed-in areas, and made use of the landscape.

“He wanted to be able to see outside. He loved light and trees,” said his daughter, Susan Sugar Nathan of Ruxton.” Each home was unique to the site it was on.

“His focus was his work and his family,” she said.

In the late 1960s, he built Stevenson Village, an apartment complex that is now condominiums. Twenty-three years ago, he started Pomona, a complex on the former Hutzler estate off Reisterstown Road. It includes gardens, mid-rise apartments and a commercial center.

Born in Bennettsville, S.C., he moved to Baltimore when he was a child. He graduated from Forest Park High School.

He served in the Navy in World War II, spending about two years in Africa.

He married Lucille Waldman in 1951.

He enjoyed swimming, skiing and tennis, as well as traveling.

Private funeral services were held yesterday.

In addition to his wife and daughter, he is survived by two grandchildren.

This is the obituary of a man I never met, but who continues to touch our lives on a daily basis nearly two decades after his death.  We live in one of his custom homes, we shop at the farmer’s market at Pamona which he built, and often grab breakfast at a café and even see a dentist at Stevenson Village — a charming little shopping center that he created — nestled just up the road in Greenspring Valley.  Hats off you, Mr. Sugar.

Photo courtesy of Stevenson Village.


1 Comment

Moodboards to the Rescue

Many apologies for the long absence.  The hiatus was three fold:

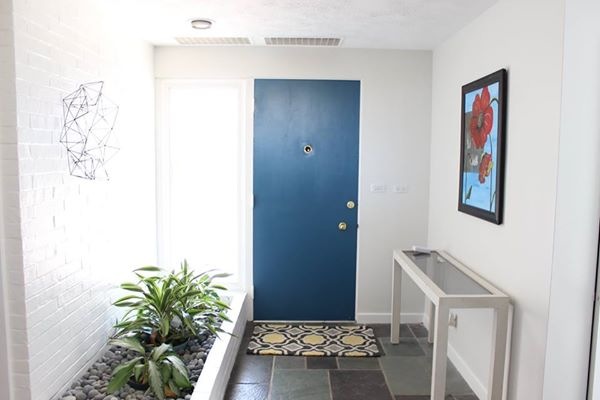
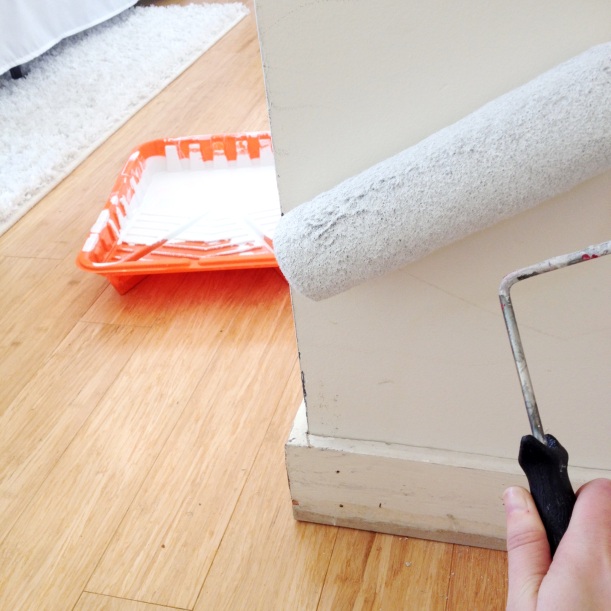
1) Having the house was FINALLY painted from ‘meh’ back to white was a long and trying process.  The change, while striking in person, is hard to document in photos since most my readers already assumed the dingy ‘meh’ color coating everything from doors, baseboards, ceilings and closets WAS white (many thanks to iphone filters!).  So, no reveal post for you, though you can check out this post wherein I did a small progress update and highlighted a couple feature walls.  I will show you this though — we painted our door Bermuda Blue to match the fireplace.  Love.

IMG_8668

2) We’re starting to slow down in the frequency of our projects.  The more we get our house feeling like a home, the less compelled we I feel to continue tweaking it.  Don’t get me wrong, this place is far from magazine worthy, but there are more important things in the word.  Which brings me to…

3) Little Miss Quinn was born. This all-consuming bundle of smiles completed our family with her arrival in March.  She must have been born with some respect for home improvements because she arrived the very day our painted crew finished!  (living in a construction zone at 40 weeks pregnant is no joke, y’all!)

IMG_0155

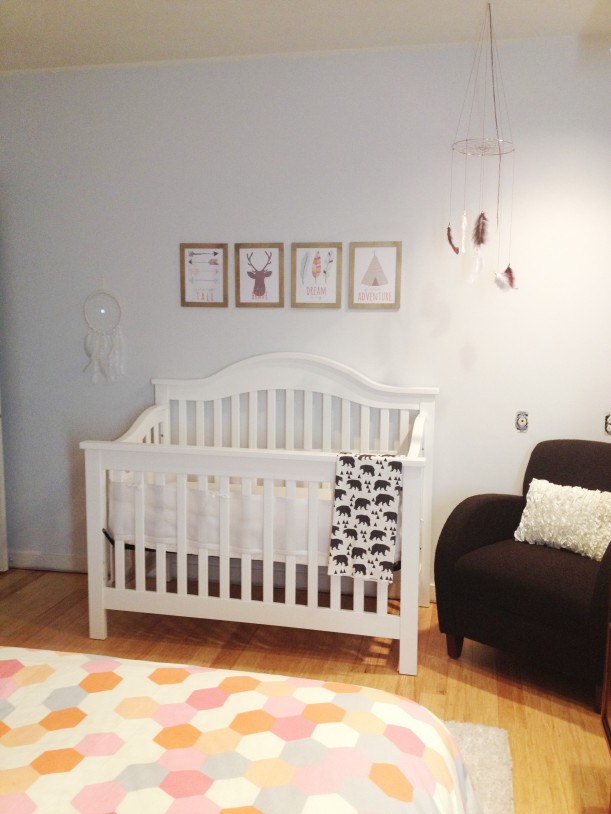
Needless to say, she and her brother have taken a good bit of our time an energy lately — we haven’t even paused to rehang the artwork throughout the house in the aftermath of the Great Painting Project of 2015.  Well, except in her nursery.   Clearly this picture was taken while the painting was still underway, but I love how this room came together — you can check out my mood board for it in this post.  I call it ‘tribal glam’.

IMG_7633

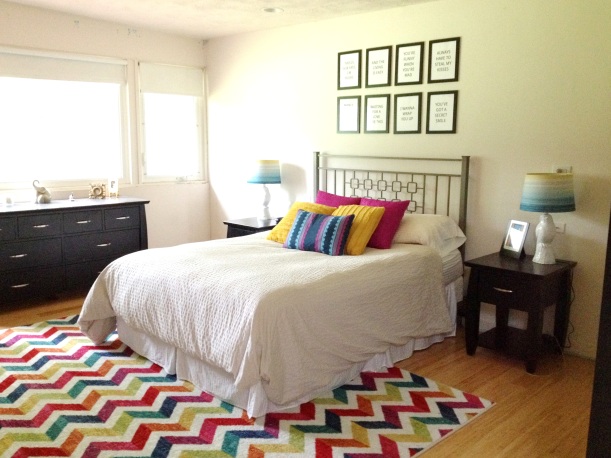
But now that things are settling down I’ve become consumed with redecorating the master bedroom. I’m not even sure redecorating is the right word here since I never really decorated it to begin with, so you can imagine it was in need of an overhaul.  This is where I left off with the master on the blog — aside from that rug moving to Logan’s room (read about that here) it hasn’t changed a bit since 2013.

IMG_6096

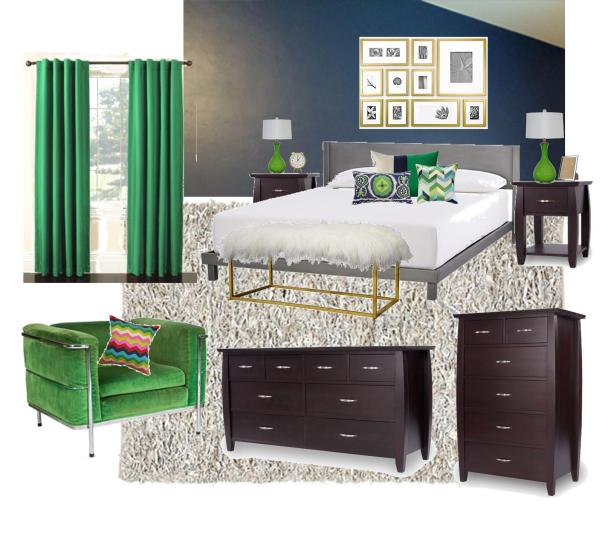
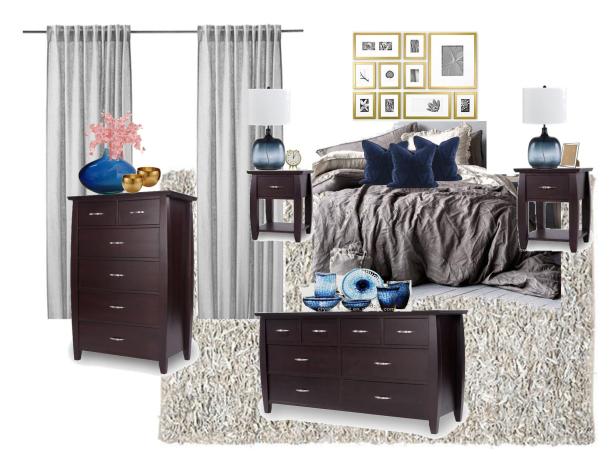
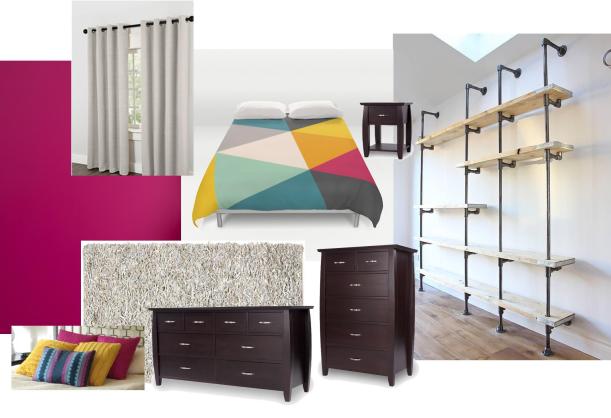
In spite of all the windows and aside for first thing in the morning, this east facing room is very dark because of the huge evergreens in the back yard. We painted the walls and ceilings bright white (lighter rooms in the house were painted a grey-white, see the nursery above) in an attempt to get the light to bounce around in there a bit more and I’m happy to say that it worked!  I was stuck, in more ways than one, with the dark furniture though. The two night stands, 8 drawer dresser, and highboy were a gift from my mom when we purchased our first house and are of exceptional quality. Unfortunately, my taste has evolved considerably since then and I was really struggling to make them work here. Being the visual person that I am, I made some moodboards to try and spark some ingenuity and I came up with a couple contenders. Does anyone else love moodboards at much as I do?!

master bedroom green

master bedroom grey&blue

Master Bedroom Inspiration

They were each great in their own way,  but I felt like I was trying too hard to inject bold colors into the room in an effort to overcome the dim lighting and the dark furniture when really what I craved was a calm and airy space. It took a while for me to admit it, but I realized that I needed to get over my guilt of unloading this bedroom set and just bite the bullet. So I’m doing it, I’m selling this wonderful 4 piece set and replacing it with a some mixed and matched pieces that really speak to me.  And so, a new moodboard was born!

Actual bedroom

Everything pictured above I actually already have — I just haven’t fully assembled it all in reality for a real photo yet. The rug we already owned, and the lamps ($39 each) and artwork ($29 each) I found at HomeGoods and purchased with store credit. The duvet ($99) is from H&M, but I used a coupon codes for free shipping and 15% off.  The curtains are the same ones as are in our living room and are from Ikea ($150 for four panels including the thermal liners), and the furniture are vintages pieces that I have collected. Oh, and I still think that DIY pipe bookshelf would be amazing (right now we have one of those 16 cube Ikea shelves on that wall — in black of course!).

I am absolutely in LOVE with how the warm wood tones work with the grey bedding to make such a welcoming space.  With the black furniture it was just too stark, but toss in some vintage pieces and a couple blue accents and I think it’s perfect.  I am tickled with my new vintage finds — a Broyhill Brasilia nightstand that I got for a song (the one on the right) and the Knoll credenza which is a family heirloom.  All told, this redo is only costing us $373 — almost half of which went to my Brasilia spurge item (soooo worth it!!) and the other half to the curtains which, with our harsh winters, were a necessity item anyway.  And let’s not forget the sale of the bedroom set which should fetch upwards of $800 and thus put money in our pocket when all is said and done.  Man, I love makeovers that pay me in the end!

I can’t wait to get it all set up.  Is it the weekend yet?!


2 Comments

A Painted House

The painting is happening, the painting is happening!!

IMG_7281

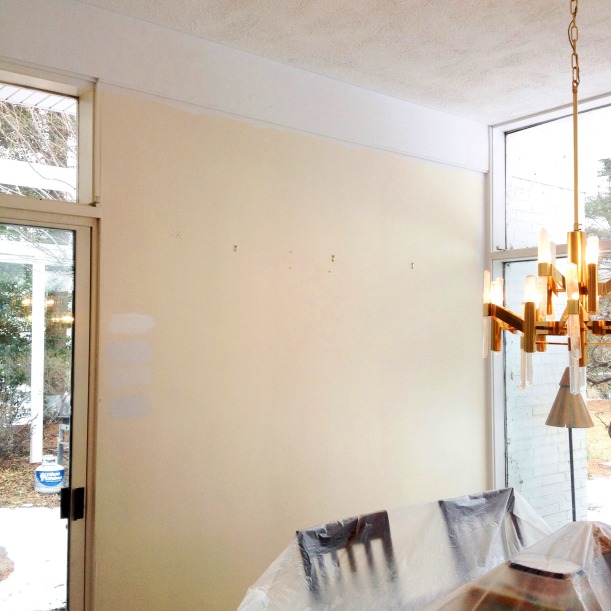
We knew when we moved in (back in July of 2013) that we were going to have to hire professionals to paint the interior of the house.  EVERY surface was painted the same pale yellow/beige — not just the walls but the baseboards, ceilings, doors, closets, brick, beams, EVERYTHING — and it’s been estimated that the last time the house was painted was upwards of 20 years ago so you can imagine what wonderful condition it was in.

IMG_3681

????????????????????????

I had started trying my hand at a few small spaces, but invariably I would get overwhelmed and would quit nearly as quickly as I had started.  The laundry room for instance has had one primed wall for well over a year! There’s just SO much patching and repair work to be done, that it just wasn’t feasible for us to do it while working full time and taking care of a toddler.

IMG_4270

But look at it now!  (sorry for the crappy fun-house photo)

IMG_8577

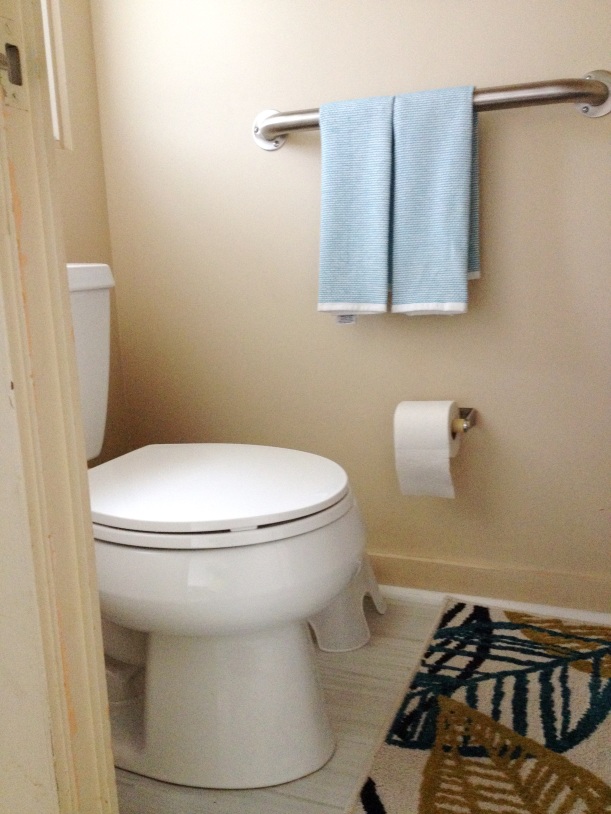
We’ve even taken the opportunity to do a little overhaul on this bathroom … removed the handicap bar and replaced the toilet paper holder, towel holder, mirror and light fixture.  Perhaps best of all we got the sink hooked up so it actually has running water (yeah… we’ve not been able to wash hands in this room for at least 6 months — thank goodness for hand sanitizer! Eww, I know).  Here’s a before shot — full reveal to come!

IMG_6115

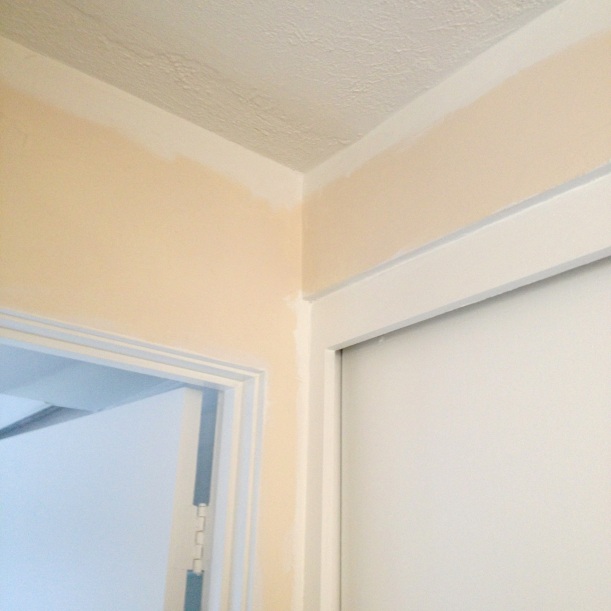
Look at that door jam.  Do you see how dirty this place has felt? It’s now starting to feel so fresh and clean!!

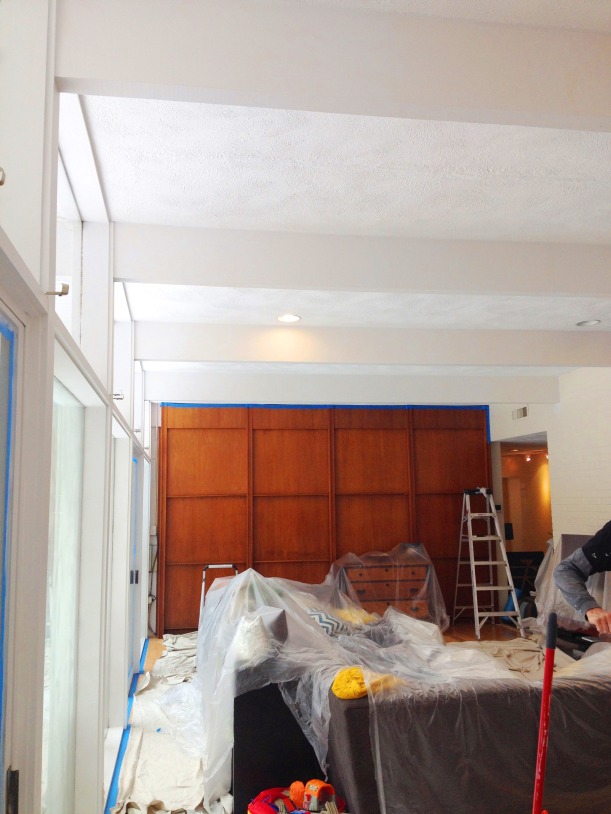
Financially, it wasn’t in the cards to get the place painted before we moved in, but oh how much easier that would have been!  We’re on day 9 of rooming in with our 3-4 person painting crew and it’s such a mess, but at least the end is finally in sight!  The reason we decided to pull the trigger on the interior painting now?  Well, today is the first day of spring and it’s looking like this outside.

IMG_8595

And contractors are hurting.  Bad for them, but good for homeowners!  On a whim I decided to get another quote (I’ve become a serial quote collector — historically they’ve ranged from $8-$12k!!) and was delighted when it came in WELL below previous figures.  Thank you, snow!

Oh, and the other hurdle we’re facing?  Baby #2 is due in 4 days. Yes, this is nesting at its finest! People said we were crazy to embark on this project right now (a due date is just an estimate after all!), but after talking about it we realized we just couldn’t pass up such a good deal.  So here we are …

IMG_8392

IMG_8394

The house is in chaos, but I’m finding such serenity in white ceilings, doors, and frames. :)

IMG_8560

Today is supposed to be the last full day of painting and then the crew will come back one day next week to take care of any odds and ends that we spot.  Which means this weekend will be spent deep cleaning and putting the house back together.  Yes, even with this belly.

IMG_8220edited

But I don’t care, because I’m too busy doing my happy dance and shouting good riddance to the beige!


3 Comments

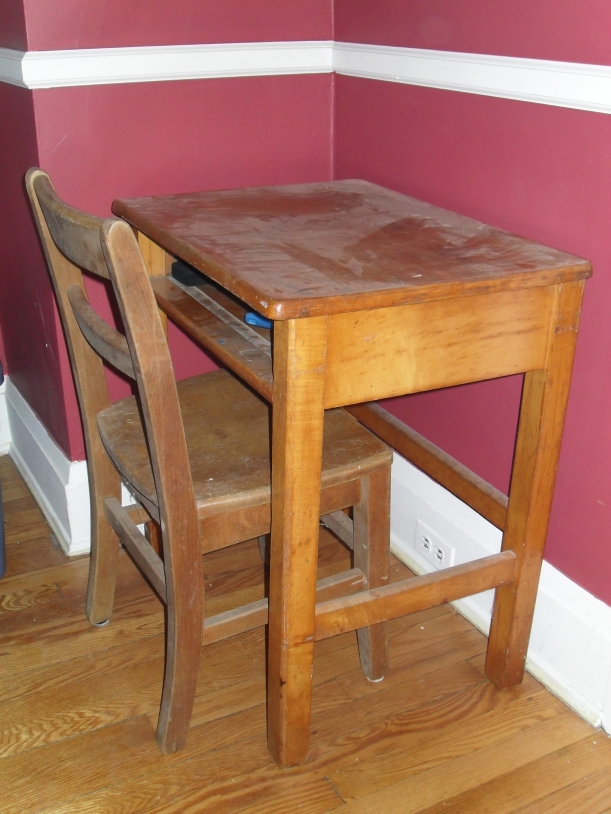
Upcycling a Vintage School Desk

We’ve had this little school desk forever — well, actually Kirk has had it forever.  Apparently he used to do his homework at this desk when he was a kid!   When we lived in our craftsman bungalow and I always figured I’d strip, sand, and restore it.  Well, I never got around to it (although I did dust it off!) and times changed so this period piece doesn’t really fit with the aesthetic of our new abode anymore.  And we have kids now, so I decided it was time to paint it and give it a little refresher so it can be used for yet another generation.

Kirk's desk before

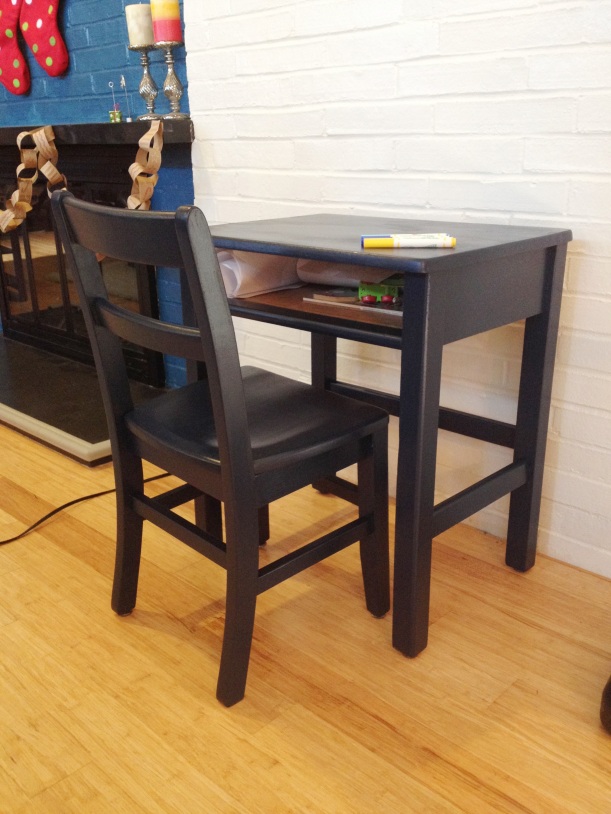
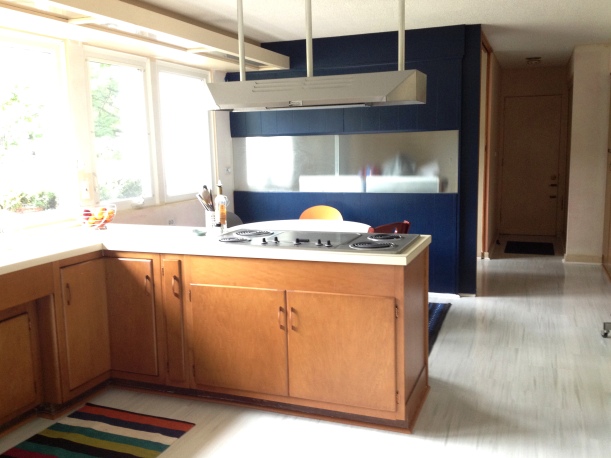
It was a spontaneous project — about 20 minutes after I put Logan down for his nap my eye caught this desk and I thought, “I can’t stand that thing for another minute.”  It resides in our living room and Logan does “work” at it pretty frequently, but really, it was an eye sore.  So I grabbed what was left from when I painted the kitchen wall navy and decided to give it a go.

IMG_7366

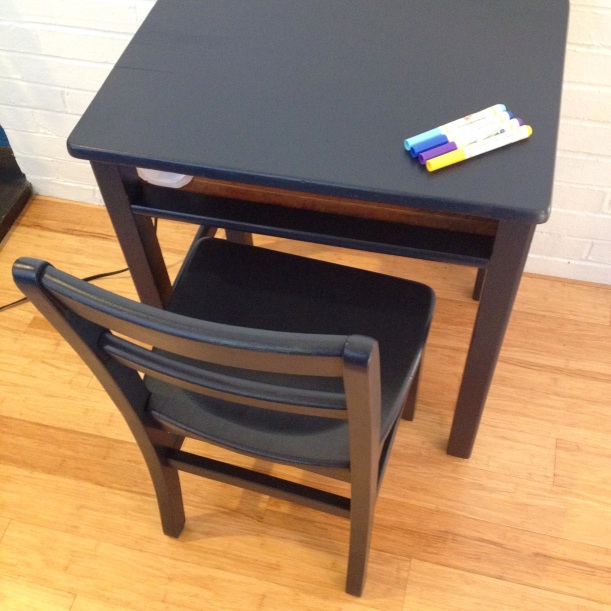
It took two coats, and I still need to poly the top for durability (and maybe wax the rest), but I think it looks SO much better.  It’s a really dark navy — it almost looks black in this room which is odd because the wall in the kitchen never looks black!  It really pops off the white brick now and I think it plays well with the adjacent Bermuda Blue brick wall, too.  The navy wall in the kitchen is just out of frame though a door to the right and the navy bicycle print is only a small bit away as well — I like that they all tie in together.

IMG_7368

Anyway, I just wanted to share this little update with you all because I’m totally smitten … and not just because when Logan noticed he said, “Ohhh!!! Mommy! You did this for me?! THANK you!”. :)


3 Comments

2014 House Resolutions — Pass or Fail?

In January of this year I made a list of resolutions for our then-new abode (read about them here).   It included projects that were begging for attention, projects that had stalled, and projects that I just thought would be fun.  Care to wager which of those project categories actually saw completion over the last 12 months?  Well, it’s now December and it’s time to come clean and share with you how we fared.

1) Get rid of the last of the wall paper.  At first I thought I’d actually did this one, but then I walked over to check and realized that, nope. The closet doors near the garage still have the fuzzy beige wallpaper backing.  In fact, the walls in that hallway still have traces wallpaper glue on them, too. It’s funny how when you walk by something every day you just start to accept it and don’t even notice the flaws anymore. FAIL.

???????????????????????????????

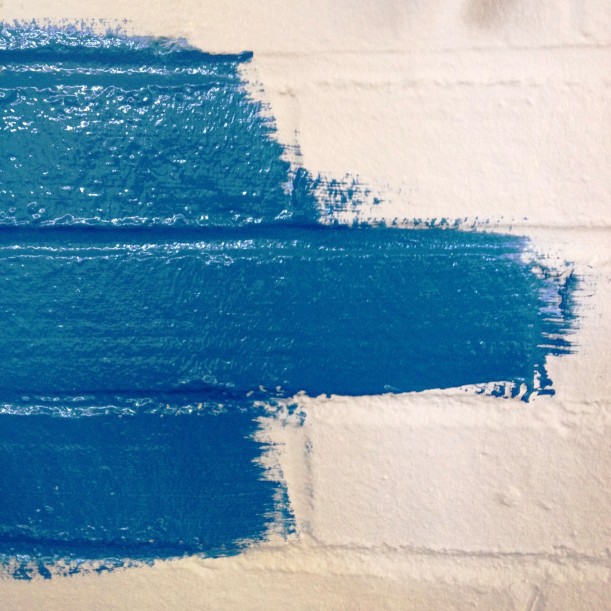
2) Paint the kitchen/laundry/half bath.  Nope. Nope. Nope.  I did paint the paneled wall navy and that made a HUGE difference.  I also did some drywall patching.  One wall in the laundry room got a coat of primer and half the brick wall in the kitchen was refreshed.  Yep, half a wall.  Even my toddler pointed this out to me the other day.  “Mommy, you painted this?  But not this??”  This is another FAIL.

IMG_6113

IMG_3627

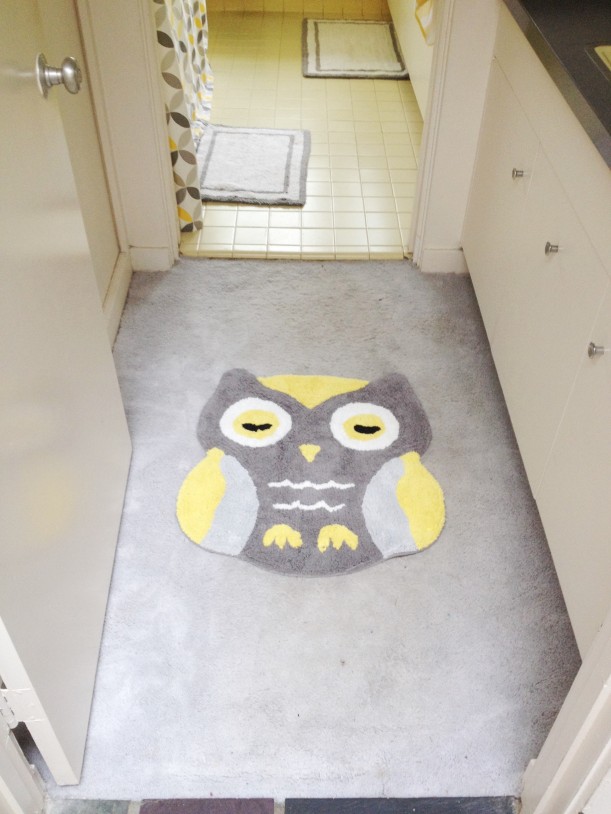
3) Address the kitchen and the yellow bathroom floors.  Ahh!  I did this one!  It was a month of pure hell, but we got new VCT floors in the kitchen, laundry room and half bath.  And we love them.  The yellow bathroom?  Yeah, not so much.  Every once in a while I look for deals on carpet squares to replace that weird patch of loose carpet in the sink area, but haven’t found anything great yet.  And I have no idea what to do about the missing yellow ceramic tiles.  For now we just cover them with a bath mat.  Out of sight out of mind!  I’m going to be generous and give myself a PASS on this one because even though I didn’t complete the bathroom floors at least I’m still actively thinking about it — which is more than I can say about that wall paper…

IMG_6105

IMG_0723

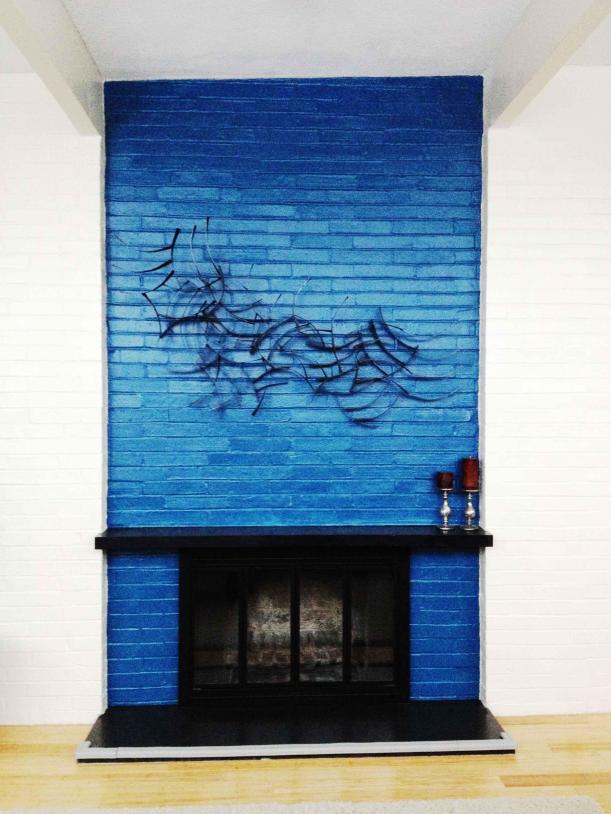
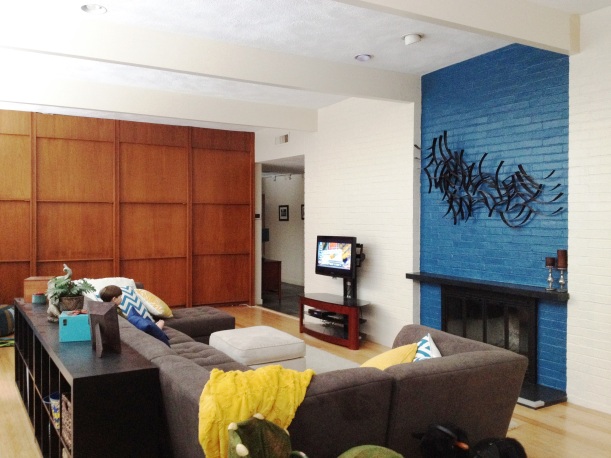
4) Address the fireplace situation.  Another PASS!!  This one was actually a pretty fun project.  I decided to paint the brick around the fireplace Bermuda Blue and it looks fantastic.  We get compliments on it all the time.  I even painted the brass fireplace surround a matte black which was oh so necessary.  My mom is still getting on my case about doing something with that iron art piece, but I think other than giving it a good cleaning , I’m pretty happy with it as is.

IMG_3573

IMG_3903

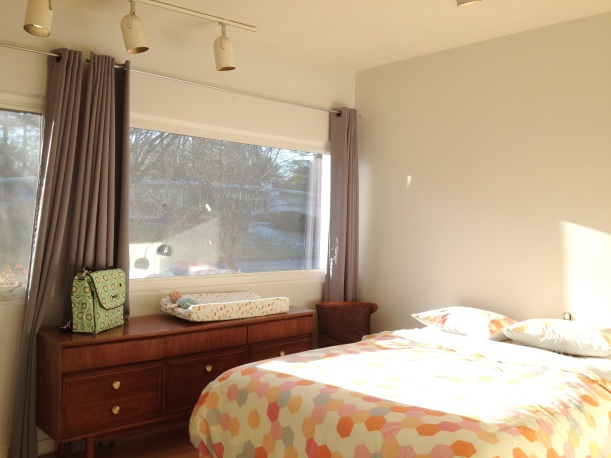
5) Get the guest room in order.  Hahahahahaha!  Hahaha! … Ha.  So  yeah, the guest room.  Well, for a while there the guest room was looking so nice that it was my favorite room in the house (you can see it here).  I love the light that it gets and the vintage furniture I’d gathered throughout the year along with the textiles I’d collected had really brought it together nicely.  Then we added a crib and suddenly it wasn’t a guest room anymore — it was an awkward, shared baby/guest space.  But, last week we painted it (and finally patched and caulked the baseboards which was a huge undertaking!) and hung curtains and it’s looking lovely, so that’s something.   So even though we still need a headboard and updated track lights (new paint made those cans look crazy yellow) I’m giving us a big fat PASS.

IMG_7281

IMG_7286

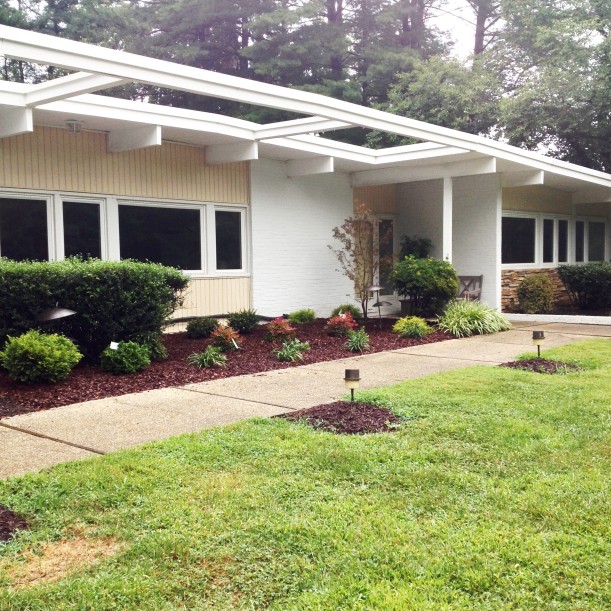
6) Finish pruning the shrubs.  We did this.  I think.  Yes, I know we did, it’s just that we now need to do it again.  But really, we spent many hours pruning and digging and planting and watering and for that we get a pass (and a round of applause) on our front landscaping.  But if you swing by, just don’t mind the leaves that need raking, or the overgrown shrub that needs trimming or the four plants along the back of the planting bed that died.  M’kay?

IMG_6181

But for all the items that we didn’t get to, there were a bunch of unforeseen projects that we did tackle.   Like a thrifted and refinished coffee table, a made over den space, a few new rugs and kitchen chairs, and a cleaned out and updated indoor planter!

As for next year?  Here’s what I’d love to get accomplished:

1) Paint the bedrooms and hallway.
2) Paint the kitchen, laundry room and half bath (this would include final wallpaper removal).
3) Figure out the carpet situation in the yellow bath.
4) Install quarter round in the master bath/closet (there’s stills gaps around the sides from when we had the hardwood floors installed two summers ago) and fix busted drawer front.
5) Hook up the water to the new sink the half bath. And to the ice maker while we’re at it.

My plan was to hire out the painting work, but that was before we were planning on paying for two kids in daycare.  Guess I’ll have to suck it up!


3 Comments

A Tribal Glam Nursery

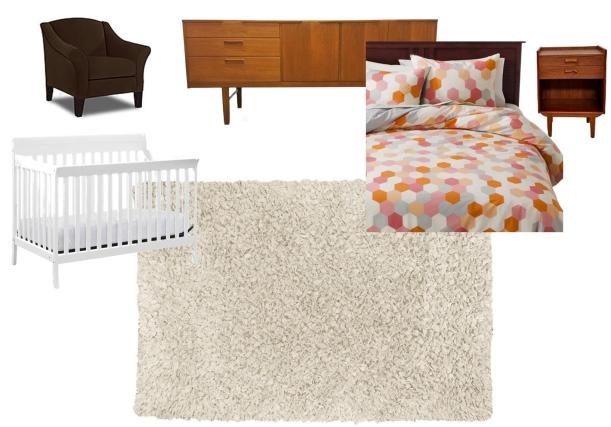
I know what you’re thinking… “What the hell is tribal glam, Olivia??” and to be honest I’m not sure I know myself.  I think I made it up.  But I was looking around our guest room — soon to be nursery — and was trying to re-imagine it for a little girl.  We have tons of wood tones and blush colored accents in the room already and it would be nice if I could incorporate them and save a penny… but they don’t exactly scream baby.

Here is what we are working with:

Picture1

So I started thinking about adding gold.  And maybe black or charcoal for contrast.  And maybe feathers and some more geometric shapes to play up that duvet… and tribal glam was born.

Picture2

It’s not a girly-girl room by any stretch of the imagination (let’s all have a quiet moment of prayer that I don’t end up with one of those), but I did incorporate some pink for her so I’m proud of myself for that.  And I loooove the idea of a dream catcher mobile, don’t you?!

For the headboard I think we’re just going to go with a hollow wood door stained a middle-of-the-road wood tone and mounted directly onto the wall.  And then we can have some fun with a painted design — maybe in gold.  Something a little like this, but smaller and darker in color:

6fee95dc8888dba96bb0c6b316a8f429
source

Should be fun!

Source list:
Dream catcher mobile
Bear baby blanket
Set of 4 Nursery Printables

Geometric Grizzly art print
Be You art print
You Are Our Greatest Adventure art print
Janey Pillow — CB2 (discontinued)
Baby quilt
Metallic gold arrow wall